Day 029 - Database rights and creating queries
It's nice to be back after a week away from WinDev (though not from other work). It seems longer than that - certainly enough time has passed that I had to dig around a little bit in the tutorial to remember where I left off.
Eventually I found my place on page 286, which talks about creating a user account in the HFS control center.
And once you have a user you can assign rights to that user.
This is just another way SQL databases are quite different from flat file databases. SQL databases aren't just data repositories, they're also tools for managing data. Typically, any program that accesses a SQL database has to connect as a specific user, and you can decide what sorts of data operations that user can perform.
Creating a user
I'm still struggling a little bit with the Control Center, probably because it has different modes of use rather than what I would call a unified interface.
Here's what I see when I first load up the Control Center:
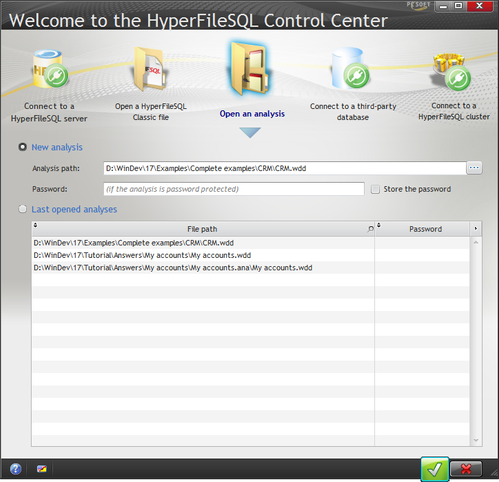
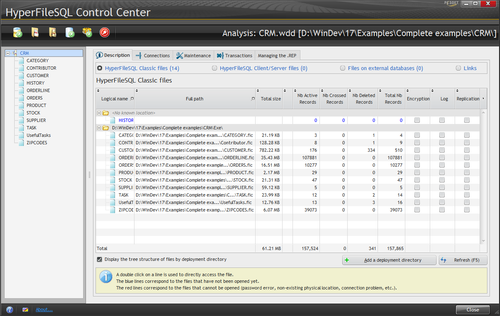
There are five different things I can do here. If I open an analysis I'll see this:
But if that's not what I want, if instead I want to connect to a server, I need to click on the first menu button to get my main Control Center menu, then choose to connect to a server, after which I see this window:
I can have two Control Center windows open at once; I just have to launch the Control Center twice.
Every HFS server has a default Admin account, with no password, so you're probably going to want to add at least one non-admin user. Here's the new user window:
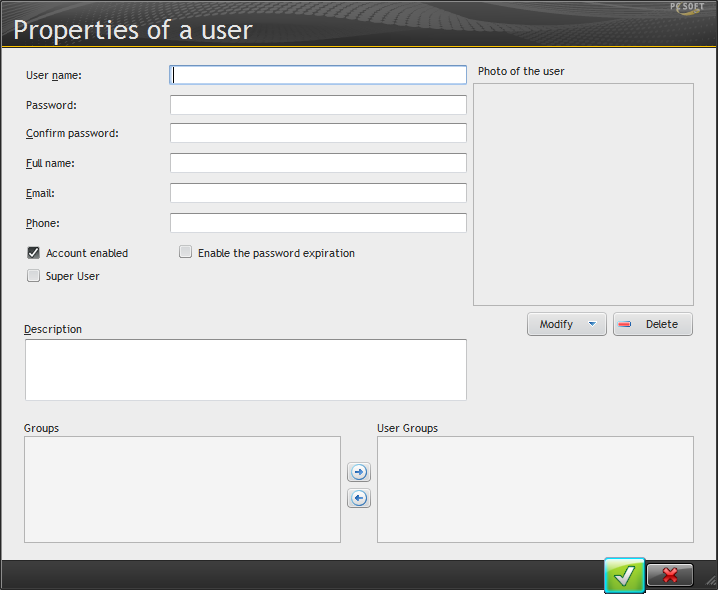
Only the first three fields (user name, password and password confirmation) are required.
There's a super user option, which will give this user the ability to do absolutely anything, including create and destroy databases. Again, this isn't something you want to grant to a typical application user.
You can also enable/disable accounts and have them automatically expire after the specified number of days.
On the Rights tab I selected my newly-created user from the drop list, but I didn't see any list of databases down the left side of the window. So I reconnected to the server, this time specifying the database I wanted to use. After I did that I was able to see my tables alongside the Rights tab. I clicked on the Account table which let me see the Rights assigned to just that table:
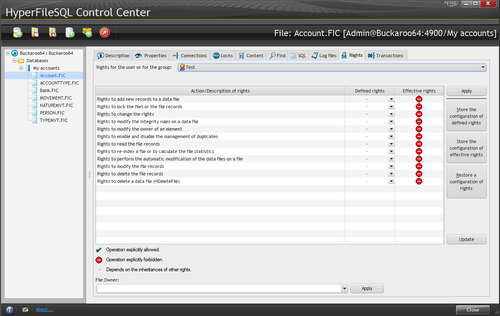
Note the two columns, one for defined rights and the other for effective rights. The options for defined rights are allow, deny, and inherit, and can be set at the server, database or table level (not all rights apply to all levels).
The buttons down the right are interesting:
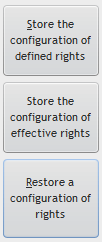
You use these to save a user's rights to a table, a database, or even a server, and then apply these rights to a different combination of user and table, database or server. It's a nice touch that makes up for the apparent lack of a GRANT syntax; in many dialects of SQL you can issue a GRANT statement which provides varying degrees of granularity in rights assignment. But maybe that capability is available somewhere in the database and I just haven't found it yet.
There's a brief mention in the tutorial of the need to modify the installation process to include steps needed to set up client/server access.
The query editor
Page 296 of the tutorial goes into some detail on queries, which were touched on earlier in the tutorial.
I like WinDev's approach to queries - by treating them as first class entities, WinDev makes it easy to define and test the queries you need and reuse them wherever.
These are the available query types:
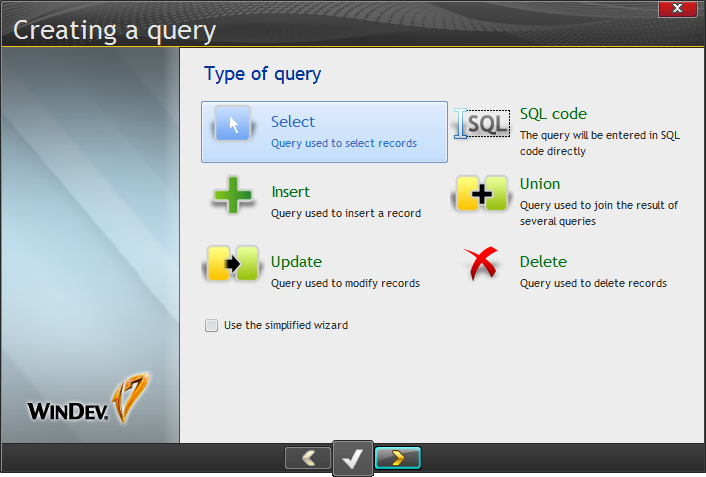
I'm always a little bugged when I see the term "query" applied to something other than the retrieval of data - as you can see, WinDev's definition encompasses all kinds of SQL statements including inserts, deletes and updates as well as arbitrary code.
Here's the beginning of a select query, following the tutorial on page 298.
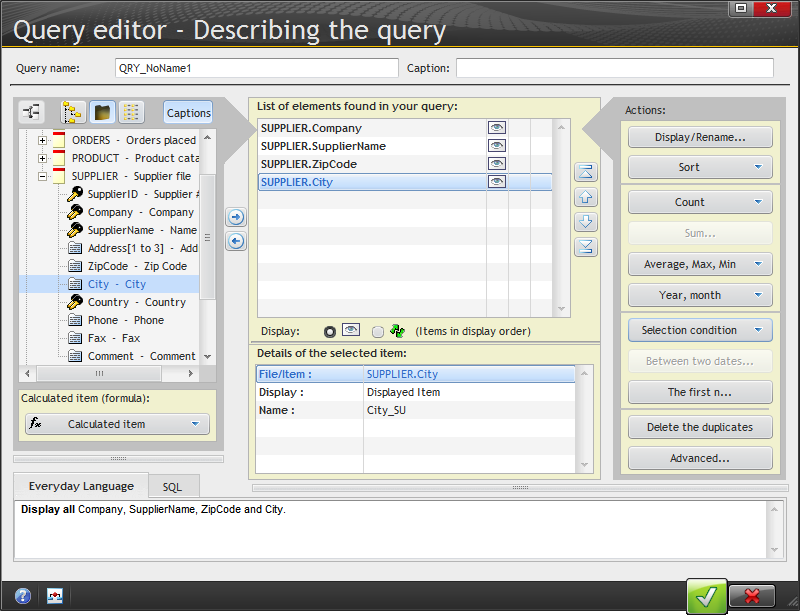
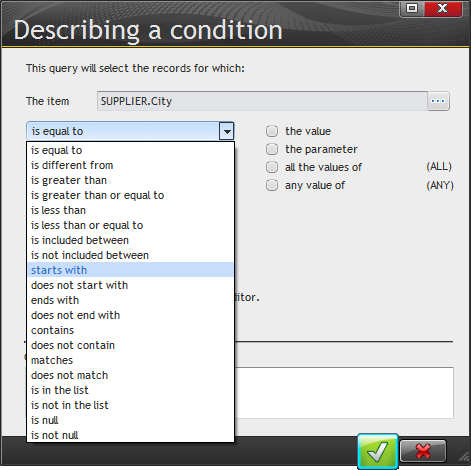
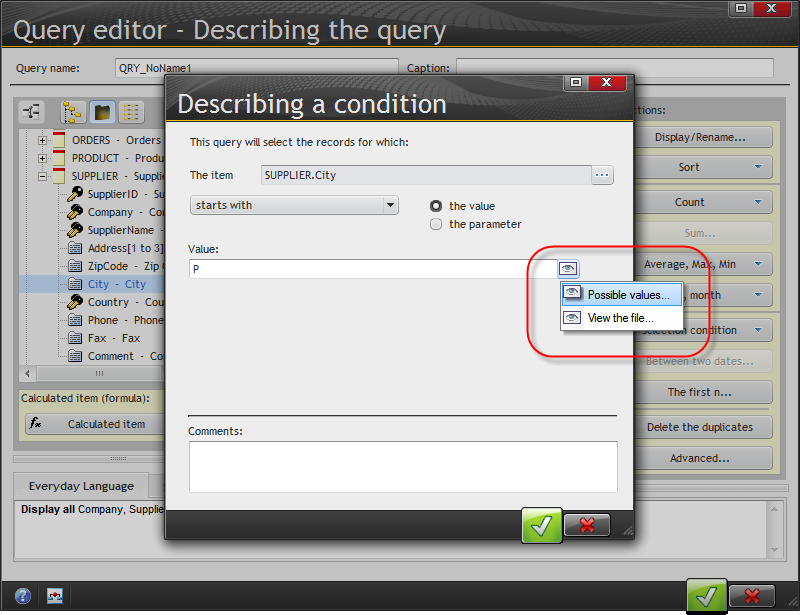
Told to filter this by cities beginning with "P", I clicked on Selection condition and created a new condition:
After specifying the value P I noticed the little eye button, which brought up the opportunity to view the column data or the entire file.
I'm out of time for today, but will be back at queries tomorrow.